
Reframing 360 Videos Tutorial with Insta360 app, it’s easy
This is my tutorial on how to reframe 360 videos on your Insta360 app.
So you’ve shot some amazing footage on your Insta360 360 camera, but how do you ensure it’s perfectly framed the way you want?
I have been using 360 cameras for years on my travels, and I think the Insta360 app is the best and easiest to use of all the 360 cams.
Click the album button at the bottom of your Insta360 app to get started! (see below)

Check out my article on why I use the Insta360 X3 as my main travel camera.
Let’s start with an example video of what possible with reframing! I got multiple angles and people from above and keeping in frame and cinematic and even able to dip in the water!

Starting basics of Reframing 360 Videos
The concept of reframing 360 videos can be compared to being a director in your own film. You get to decide where and when your audience looks after picking the scene from an entire 360 sphere that you captured with your camera.
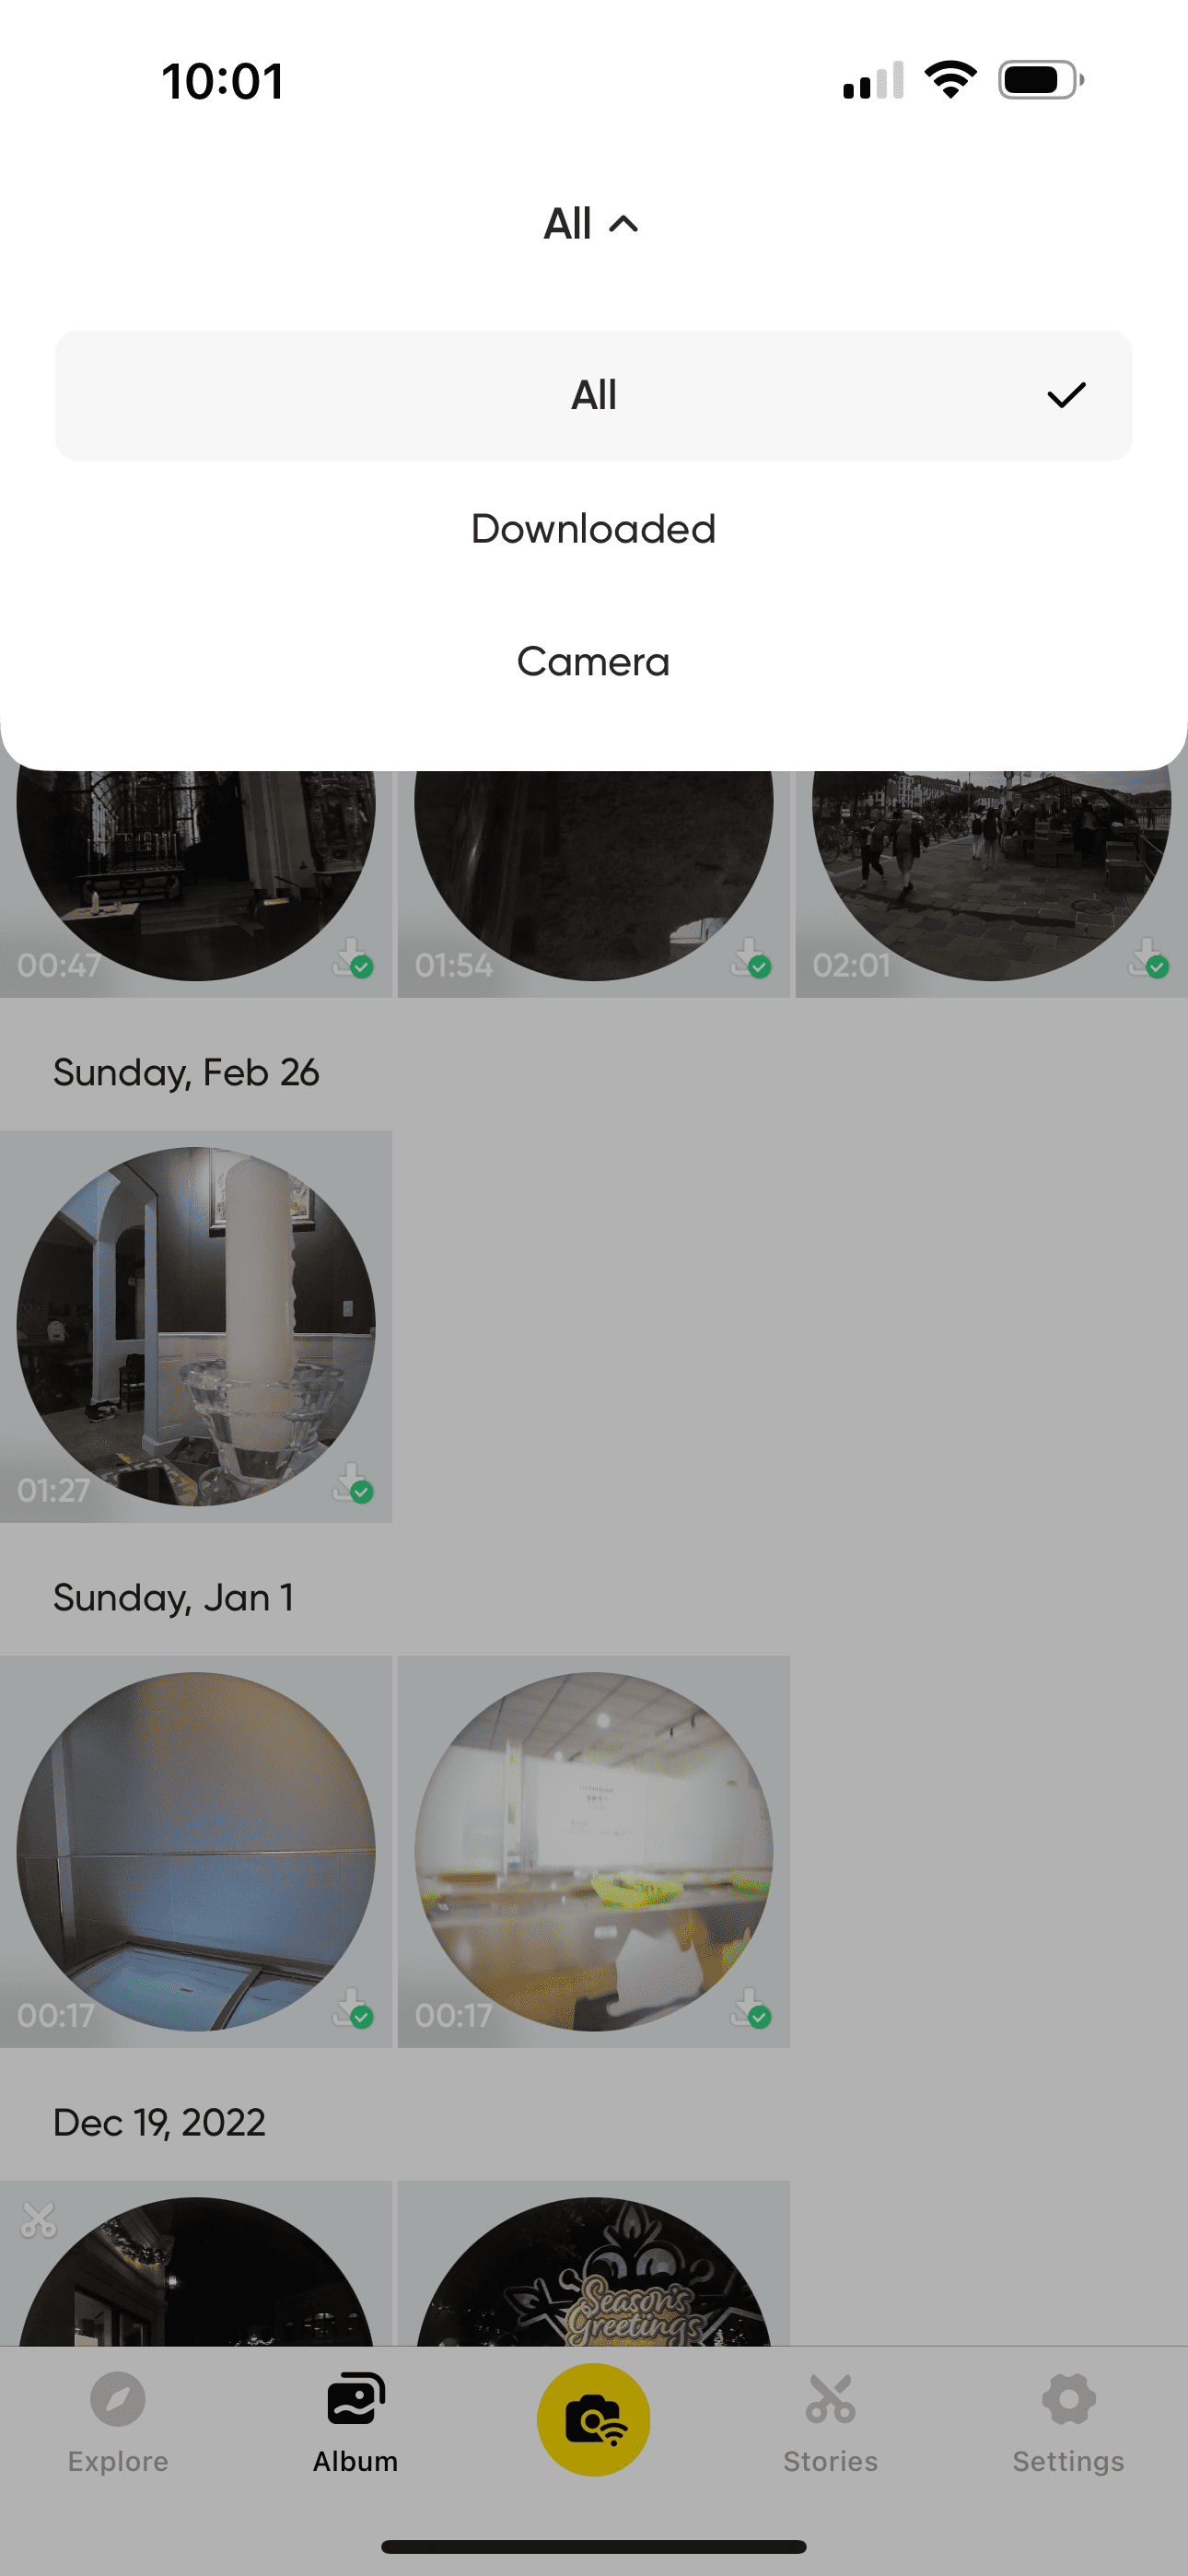
Insta360 app import
First things first, you need to import footage onto your phone or edit directly from your camera from your Insta360 app.
See the picture above that shows the album button screen with access to files directly on camera or downloaded to your phone or tablet.
Trimming Your Shots
To begin with, think about trimming shots. With our video clips, these might be shaky starts or ends that distract more than they add value.
We trim these excesses away so what remains is just the good stuff so you dont waste time reframing entire video and takes up less storage memory.
Selecting Aspect Ratio
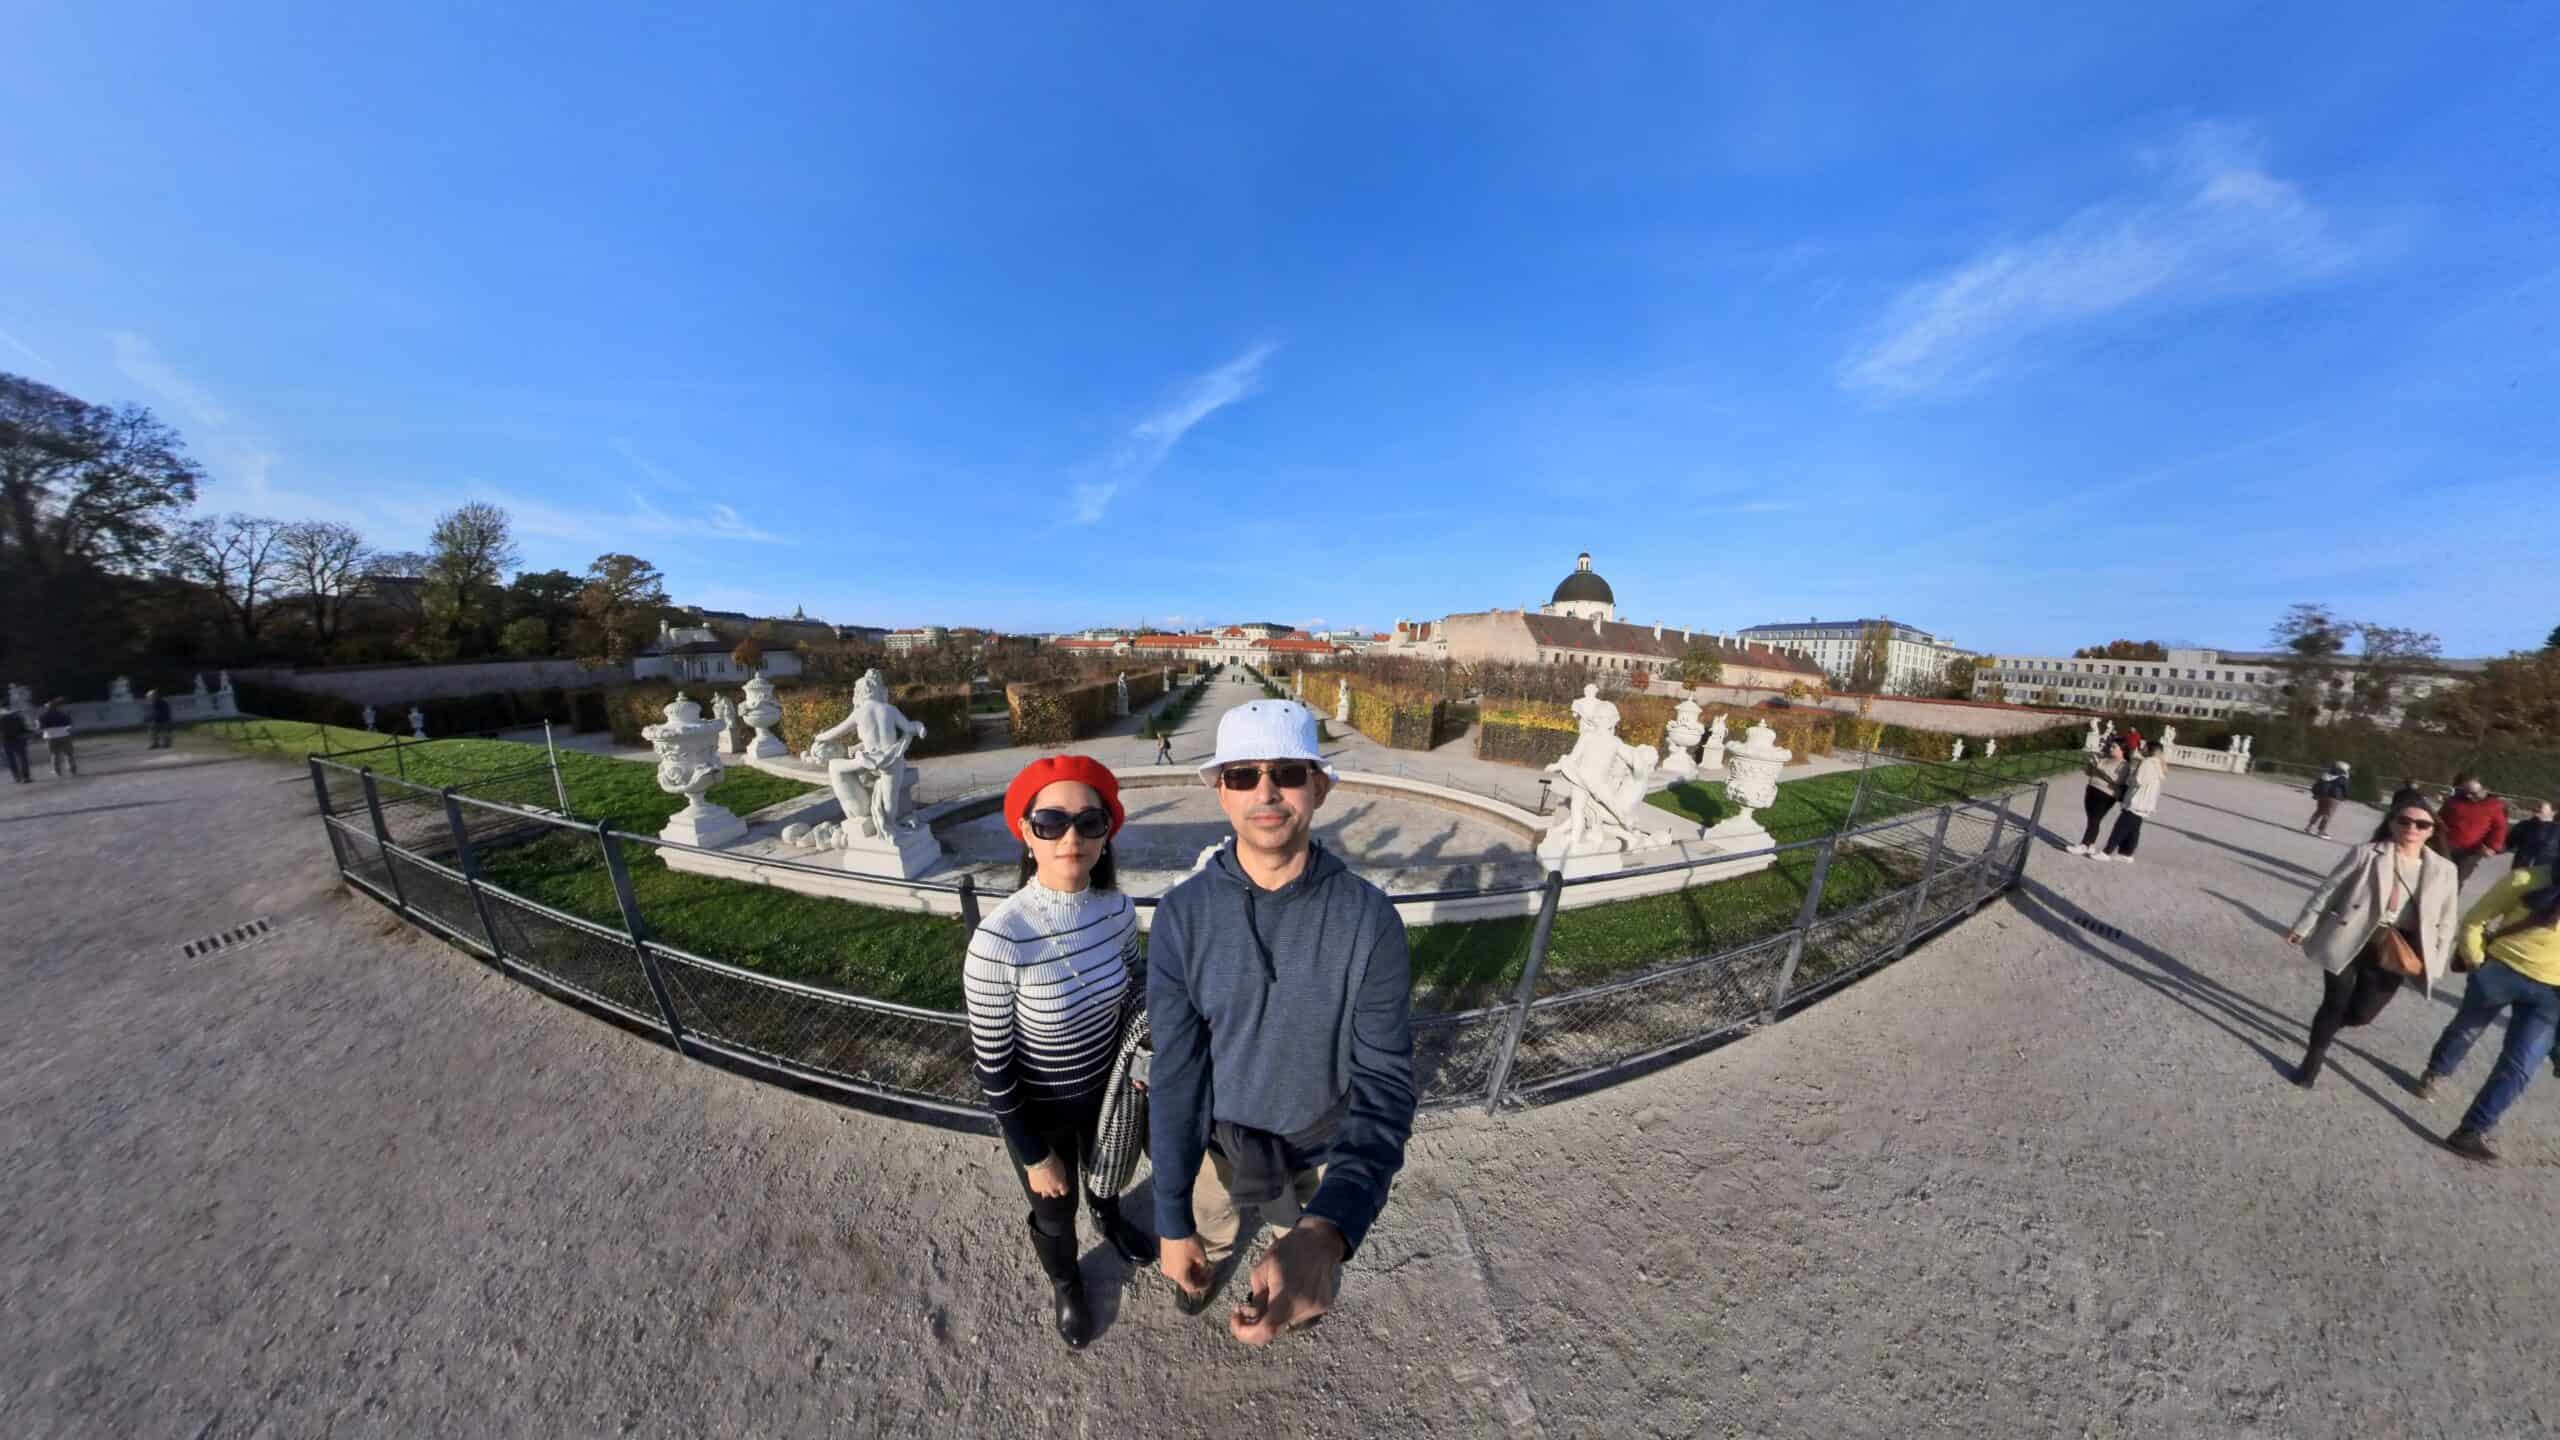
Aspect ratio selection determines how wide or tall our framed view will appear on various platforms such as social media sites or VR headsets or Youtube.
In the photo above you can see that i can change aspect ratio to cover any part of the 360 scene I want. In this case a 16:9 , but fitting more of the 360 image into that shot to made it a wide screen panorama.
We choose between portrait or landscape orientation while snapping photos during travel with a regular camera, but we can do this in app with a 360 camera since we have captured the entire scene!
Select a Insta360 app Reframe Mode
Reframing your 360 videos is about finding the right viewpoint and telling a compelling story from that perspective.
Different reframe modes offer unique benefits, allowing for creative flexibility when editing your footage.
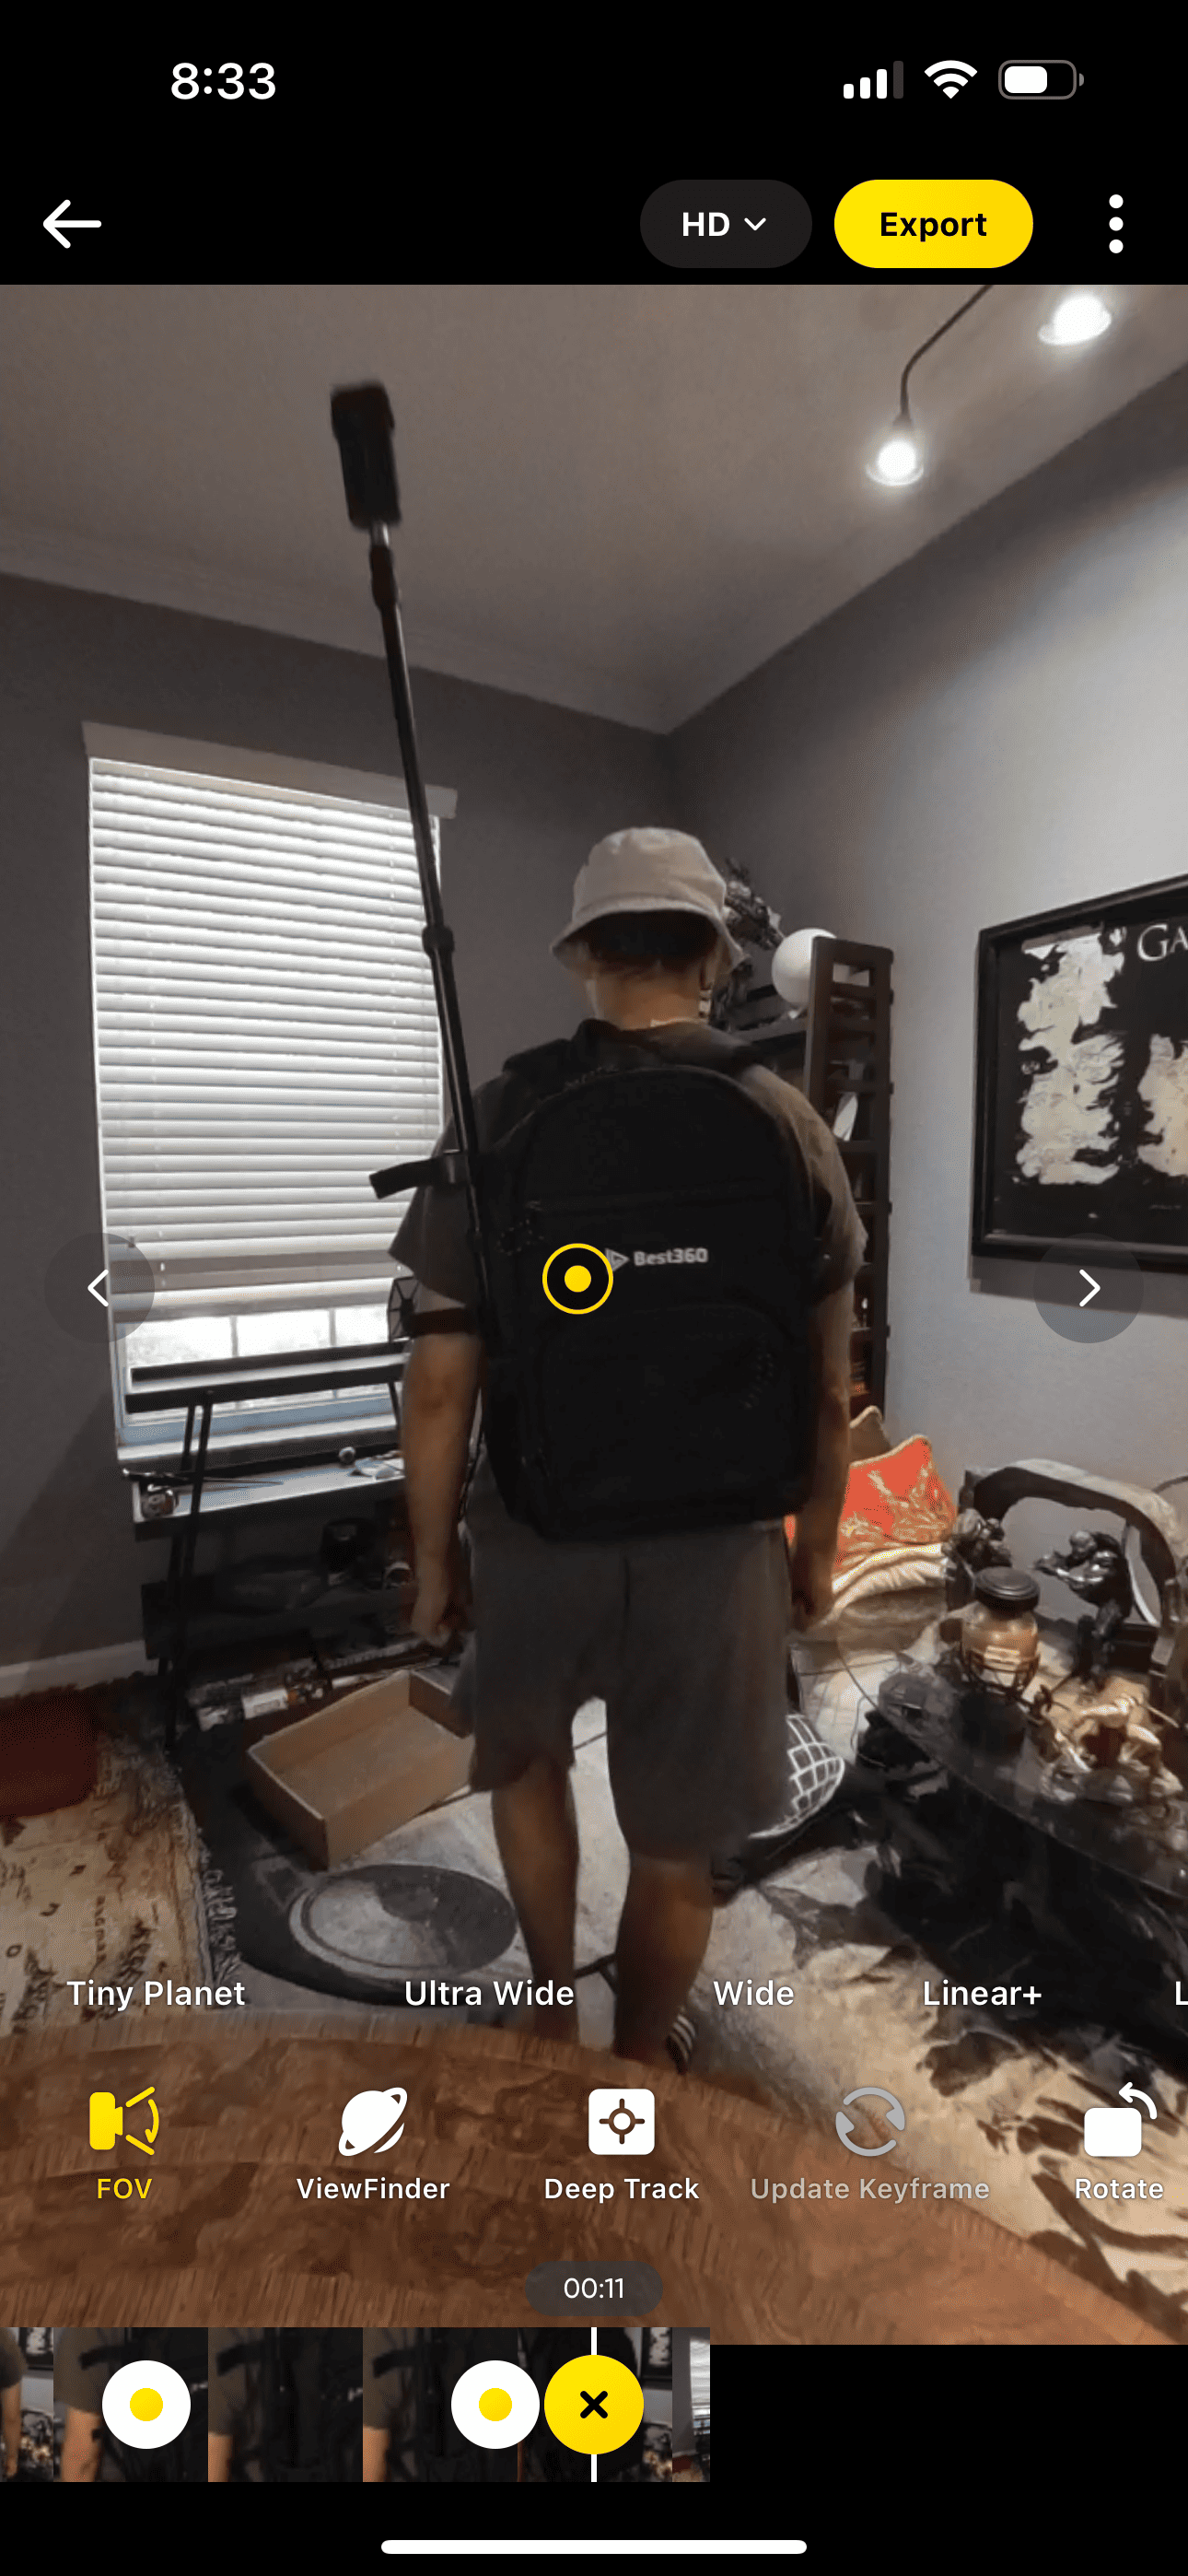
Get a closer look at the keyframe modes in the picture below
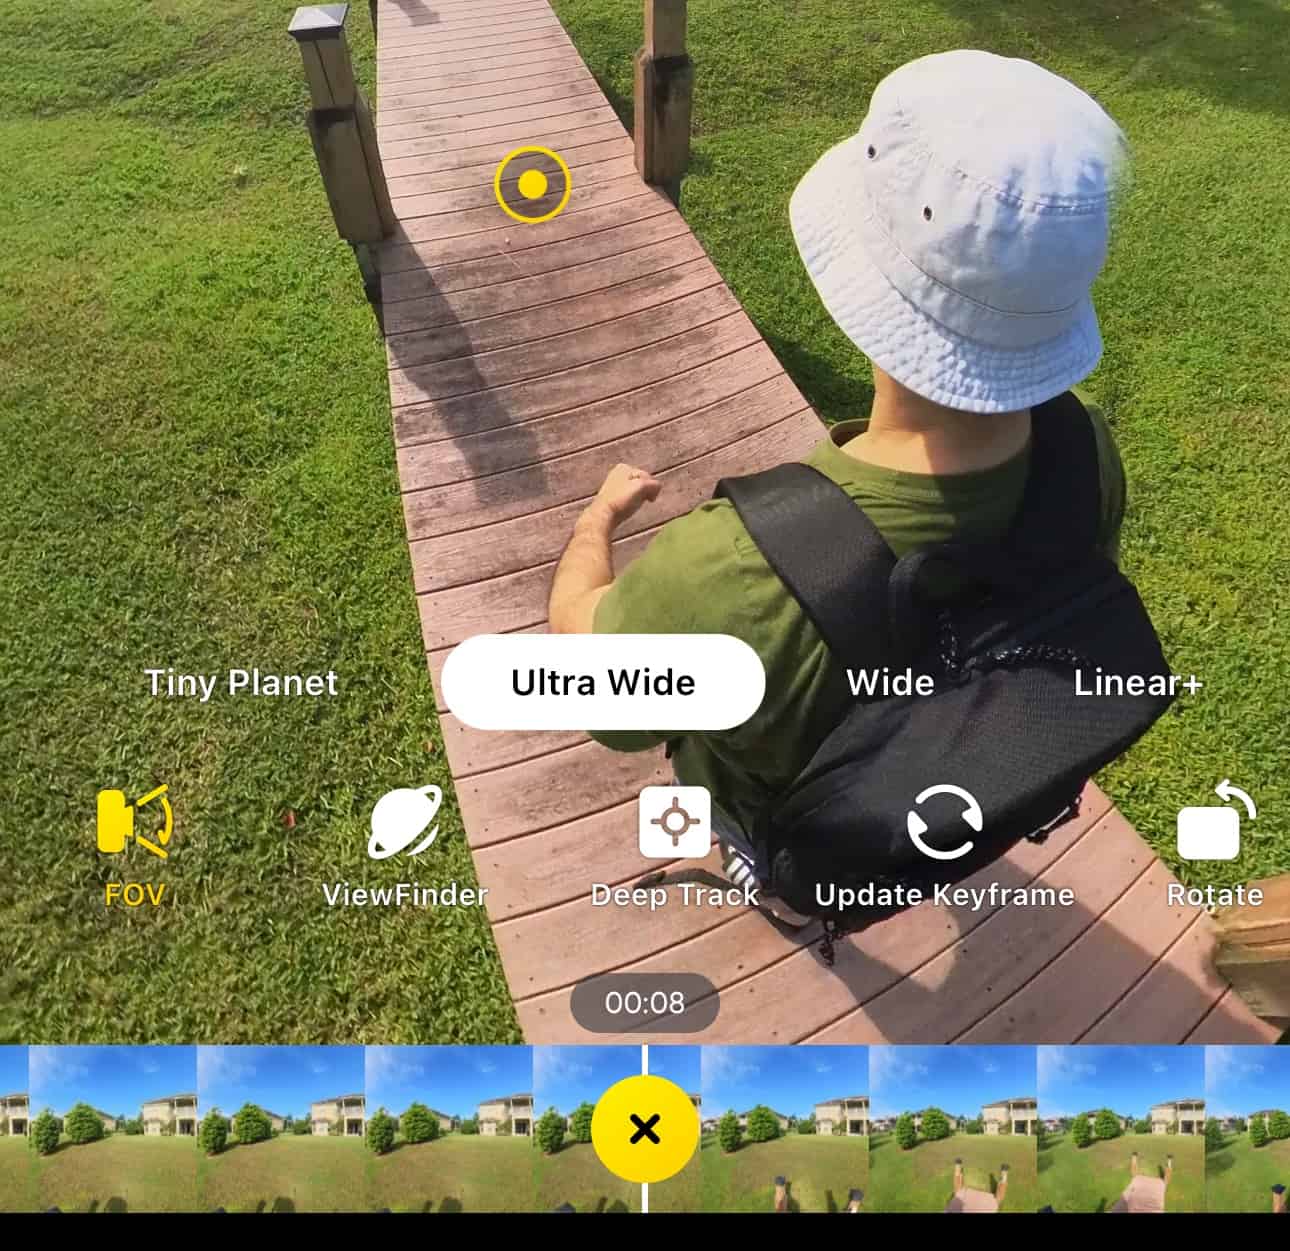
Keyframes
The keyframes feature, available on both mobile and desktop platforms, gives you control over every moment of your video. Keyframes let you choose where to focus by defining points of interest throughout the timeline of your 360 video.
You can see these on the picture above as the yellow dots at each keyframe.
This technique involves setting ‘markers’ at specific moments in time which then guide the camera view as it transitions smoothly between them.
With practice, keyframing becomes easier although there is a learning curve in the beginning.
Keyframing is the best way to get control of your video exactly the way you want.
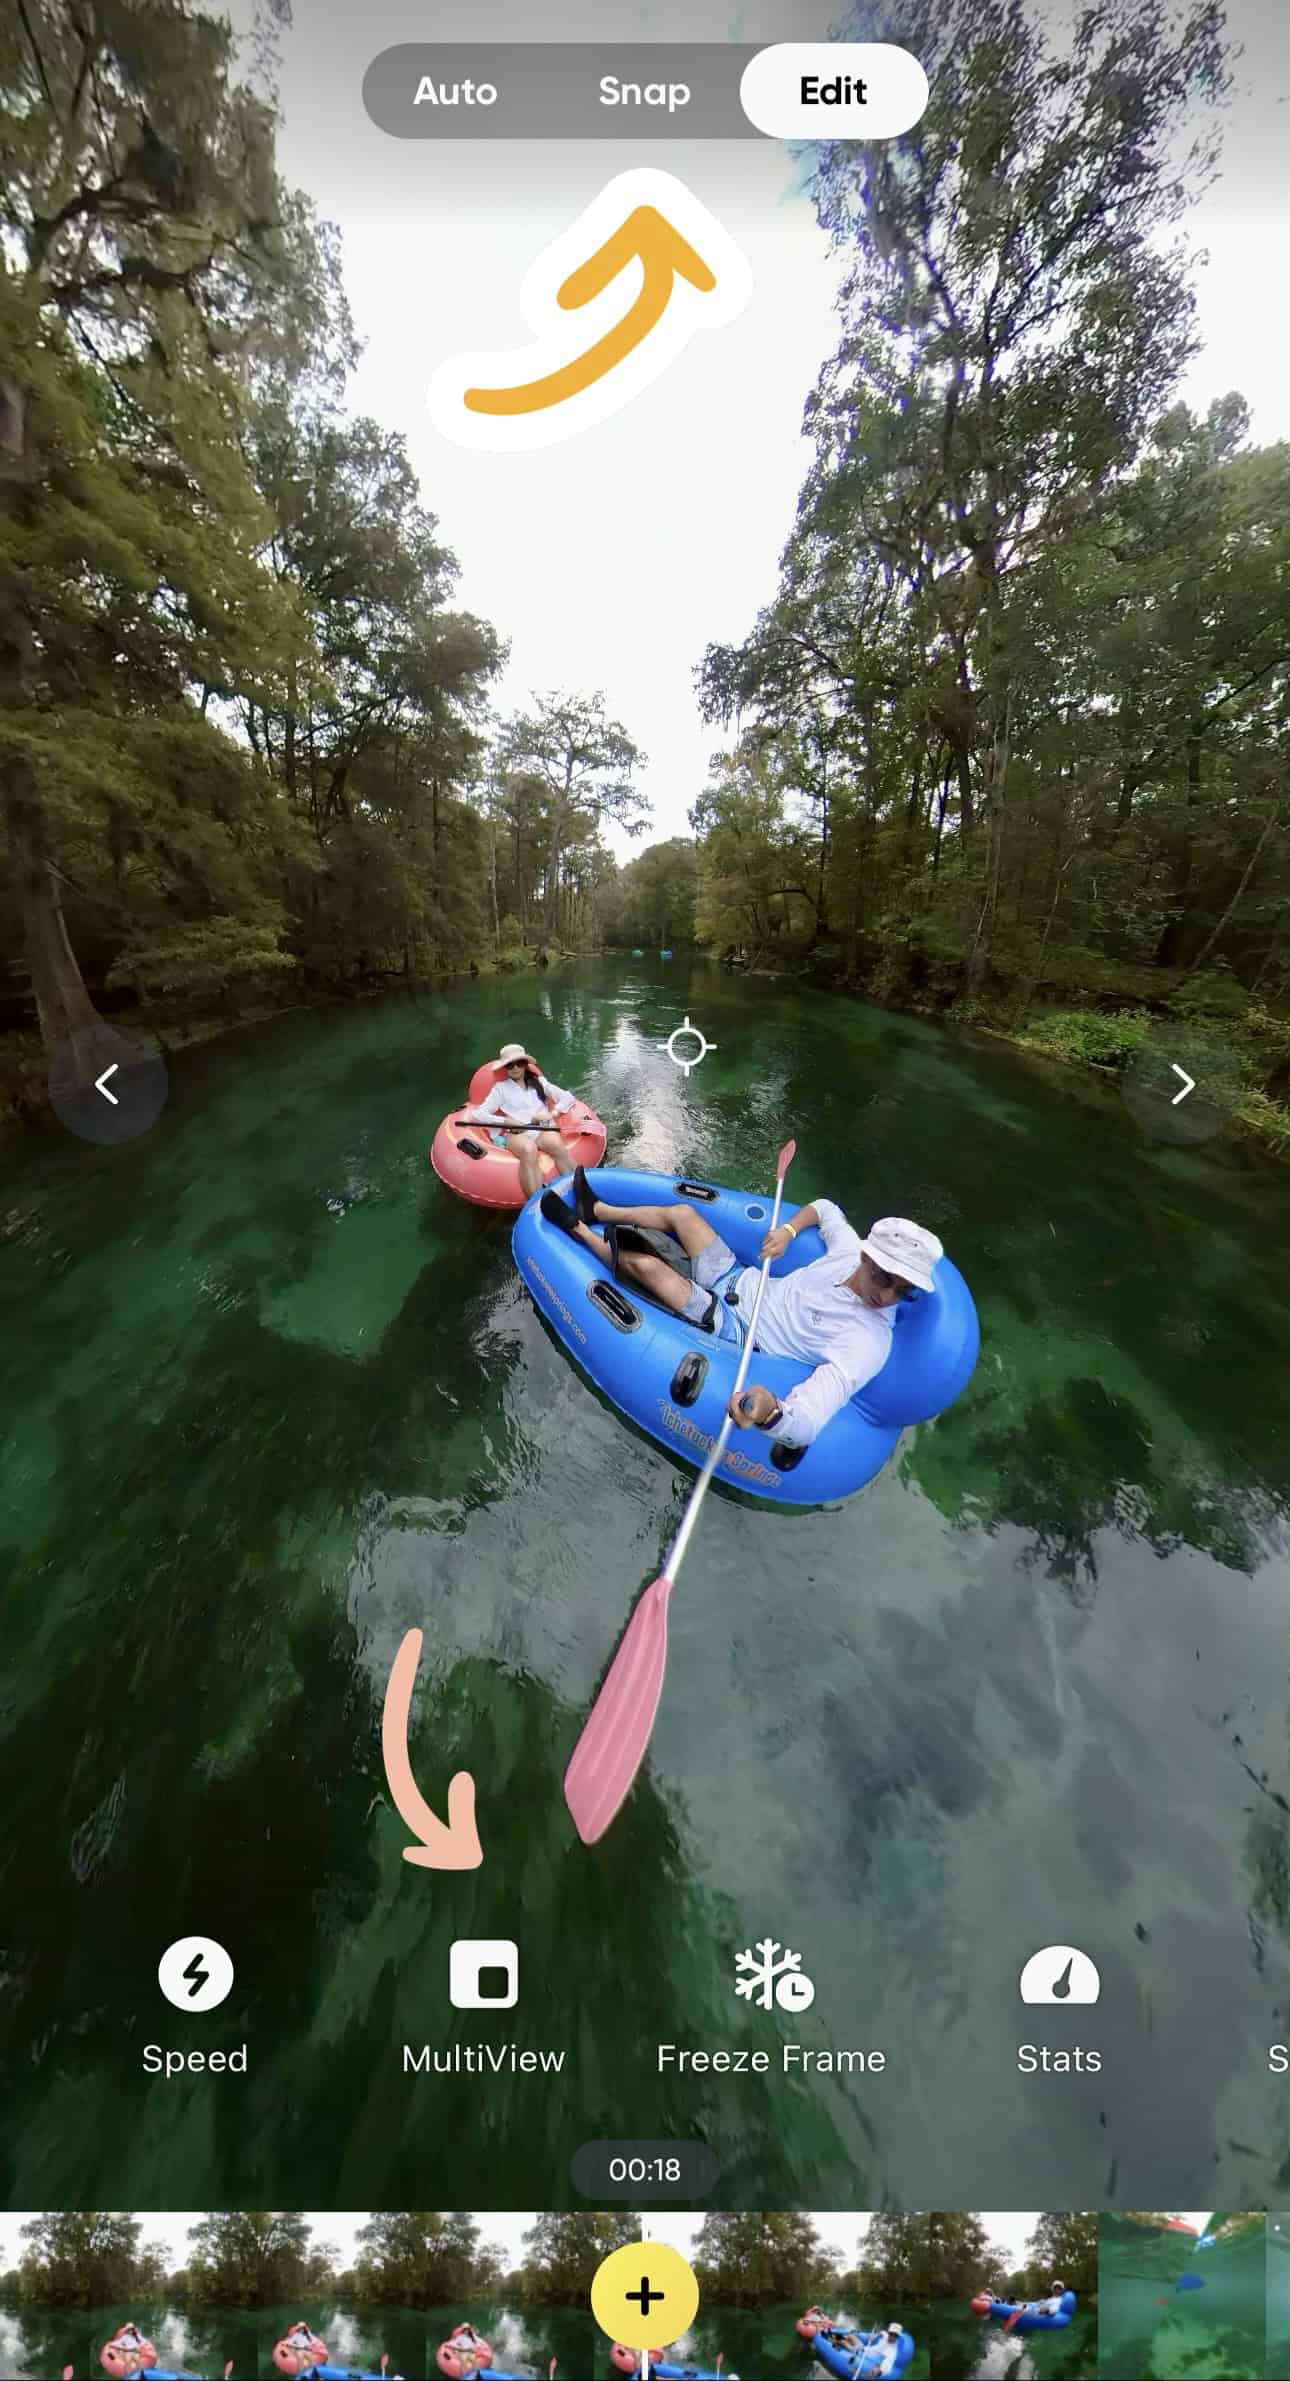
Snap
This option is at the top of the edit screen, and is the fastest way to reframe.
You control it by having your finger on the screen to zoom in and out, and then tilt your phone to point at the scene you want while the video runs.
This is a quick and simple way to edit a video but then you cant do any more specific edits. If you want to do a similar method of reframing but still want to do edits then use the “Viewfinder” reframe method (next ).
ViewFinder
This mode lets users physically move their device around to select different viewpoints within their 360 scene – just as if you were filming all over again.
Think about it like looking through a camera viewfinder, wherever you point them is what gets framed.
But this mode also lets you use the other edit functions, whereas ” Snap” does not.
Auto Frame
If you’re new to 360 video editing, or just need a helping hand, Auto Frame is a way to get started. This AI-powered feature scans the entire field of view and automatically selects interesting shots for you. It’s like having an expert director guiding your edits.
Deep Track 2.0
Deep Track 2.0 really makes it easy when it comes to keeping objects in your frame.
Just select your target and then the AI will track it throughout the video clip without needing to do keyframes or other effort.
Me Mode
The camera automatically focuses on the holder of the camera/selfie stick so you dont need to do any editing in post to keep yourself in the main frame.
You will need to enable this reframe setting before you hit record due to how it works. Also note this mode only exists on Insta360 X3.
It does this at a good frame rate since the camera “ignores” the data from top half of lenses and only focuses on bottom half of the 2 lenses pointing towards the user.
If you aren’t sure you only want to focus on yourself in the video, then its better to just not use “me mode” initially and then deep track or use keyframes in post.
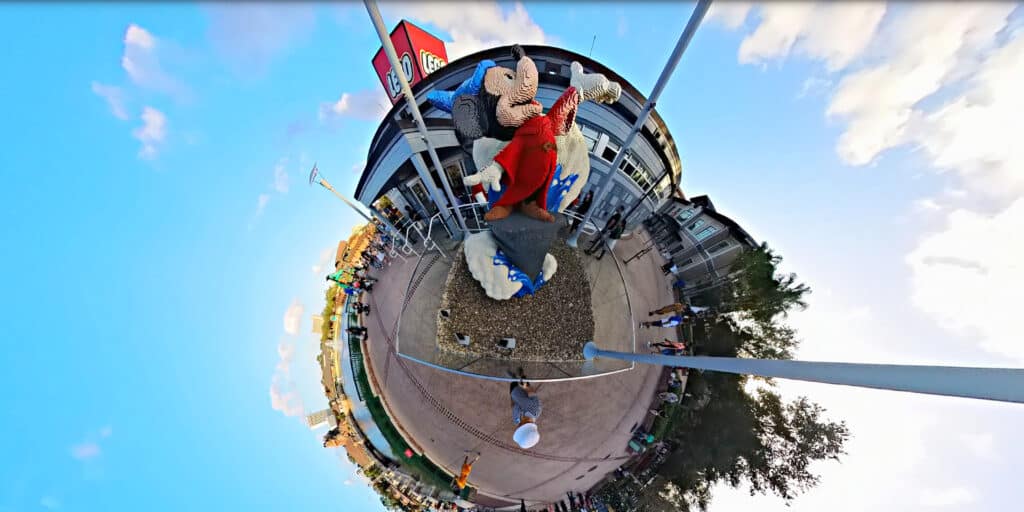
Tiny Planet
Picture wrapping up your scene into a miniature globe-like view as you see in my picture below. Only possible because you capture entire scene on a 360 camera.
Just zoom out as far as the video can go by reverse pinching your fingers and it will form a “tiny planet”, or just hit the tiny planet option in the keyframe bar. ( see above)
Rotate scene
This dramatic spinning movement adds energy to any shot.
Select “rotate” from keyframe options then adjust its amount of rotation and direction you want those spins to be.
It’s ideal for adventure-themed content or simply giving viewers an unexpected thrill. Or just manually fixing the angle of a shot you want.
This video of mine below incorporates keyframes as well as rotations and speed changes. Note the entire scene was shot with me just holding the camera above my head and walking down the street, with all the reframing done in post.
Speed
Let’s manipulate time itself in out videos. This option allows users to combine slow motion, hyperlapse, jump cuts, and regular speed all in one seamless clip.
By the way, the invisible selfie sticks are part of the magic of what makes 360 cameras way better than regular action cams, as you can see in the picture and videos above.
Check my related article on best selfie sticks for 360 cams.
Freeze Frame
A “freeze frame” captures a moment in time. It lets you pause on a specific frame and extend its duration to highlight it.
Since video is in 360, you can then rotate the shot when frozen for a dramatic effect.
Multiview
Multiview allows multiple perspectives within one shot by dividing your screen into sections displaying different angles simultaneously.
This feature creates dynamic visuals recreates multi-camera setups without needing additional equipment or crew members.
You can access Multiview through the editor toolbar; selecting it opens up different options for splitting screens and choosing individual camera views for each section.
Check out this special link to buy Insta360 X3 from Insta360 and get a special bonus.
Shot Lab AI assist reframe effects on Insta360 app
These are special effects where the AI in the Insta360 app “Shot Lab” reframes the video clips in the style you choose.
Cinelapse
Record multiple clips and AI will seamlessly put together a cinematic energetic “flythrough” type clip.
Flylapse
Does same as Cinelapse but reframes one clip for you, including highlights and barrel rolls and changes in perspectives.
Auto Timeshift
This does the same as Flylapse but also includes changes in speed thoughout video to highlight certain scenes.
Stop motion
Creates an effect as if the person holding camera is frozen while the scene moves forward.
Dolly zoom
Creates the effect of zooming out and increasing field of view without you having to edit the keyframes yourself to get the effect.
One more video example of a reframed 360 video. Would be near impossible to have caught this shot with a normal camera not knowing which way the fish was coming from so fast. You can then reframe and slow down in app.
Export Your Video
The last step in the process of reframing 360 videos is to export your masterpiece.
Bitrate
The bitrate controls the quality of your video. A higher bitrate means better quality but also a larger file size.
Resolution
You want enough resolution to make sure everything is clear without overdoing it with ultra-high resolutions that might cause buffering issues when streaming online or high storage requirements.
Frame Rate
More frames per second (fps) mean smoother movements. Generally speaking, stick with either 24 fps (for a cinematic feel) or 30 fps (standard digital video) or 60 fps (for slo mo if you had recorded at that speed in initial settings before recording).
I would say max out all the settings if storage isnt an issue to get the best quality video.
Conclusion
This tutorial on how to Reframe 360 Videos was designed with one goal in mind: giving you control over transforming raw footage into immersive stories. So go out there and start creating!
My current 360 camera.
Check out my Youtube channel full of reframed as well as full 360 videos!